
.png)
Best Tools for Creating Documentation

Best Tools for Creating Documentation
Do you leverage Google Sheets to run your business? Are you using a video tool like Loom to record short how-tos or a diagramming software like Lucidchart to visualize workflows? If so, you’re not alone. These are some of the top types of tools our software customers use with Arvo to craft next-level documentation and cultivate scalable growth. Here are ways you could get more out of your existing tools (or maybe ideas for tools you haven’t tried yet!).
Loom
Loom is a tool that helps you record your screen and create video process documentation. It is simple to use and has many features that make it ideal for creating high-quality video recordings. With Loom, you can easily record your screen, add annotations, and share with others. Loom is one of our top tools for documenting processes and sharing knowledge with our team.
You can embed your Loom recordings directly into Arvo playbooks! This makes it so much easier to explain your business processes once, rather than having to give directions to your team over and over again.
Lucidchart or Miro
Lucidchart and Miro are both great tools for adding visuals to your documentation. Easily create graphics, flowcharts, mind maps, and other types of diagrams to add to your documentation. Miro is also a great tool for creating mind maps, wireframes, and other types of visuals.
You can also embed the charts you create in Lucidchart or Miro directly into Arvo! This is so much easier than your team searching multiple different places to find your charts with little to no context.
Canva
Canva helps you create professionally designed visuals for your documentation. Canva is a great tool for those who may have zero design experience. With Canva, you can create diagrams, charts, and other types of graphics. All you have to do is scroll through the templates they offer and change the colors and content to match your branding!
We use Canva to re-size photos as well as create graphics to insert directly into Arvo. You can add photos to many of the components: Step-By-Step, Scenarios, and Rich Text Editor to name a few 🙂
Simple Editing Tools
Preview (if on Mac)
If you are using a Mac, you can use the built-in tool called Preview to edit images. Preview is a great tool for cropping, adding text, and making other small changes to images. To take a screenshot on a Mac, you can use the shortcut: Command + Shift + Alt + 4 to copy and paste and then edit in Preview if needed.
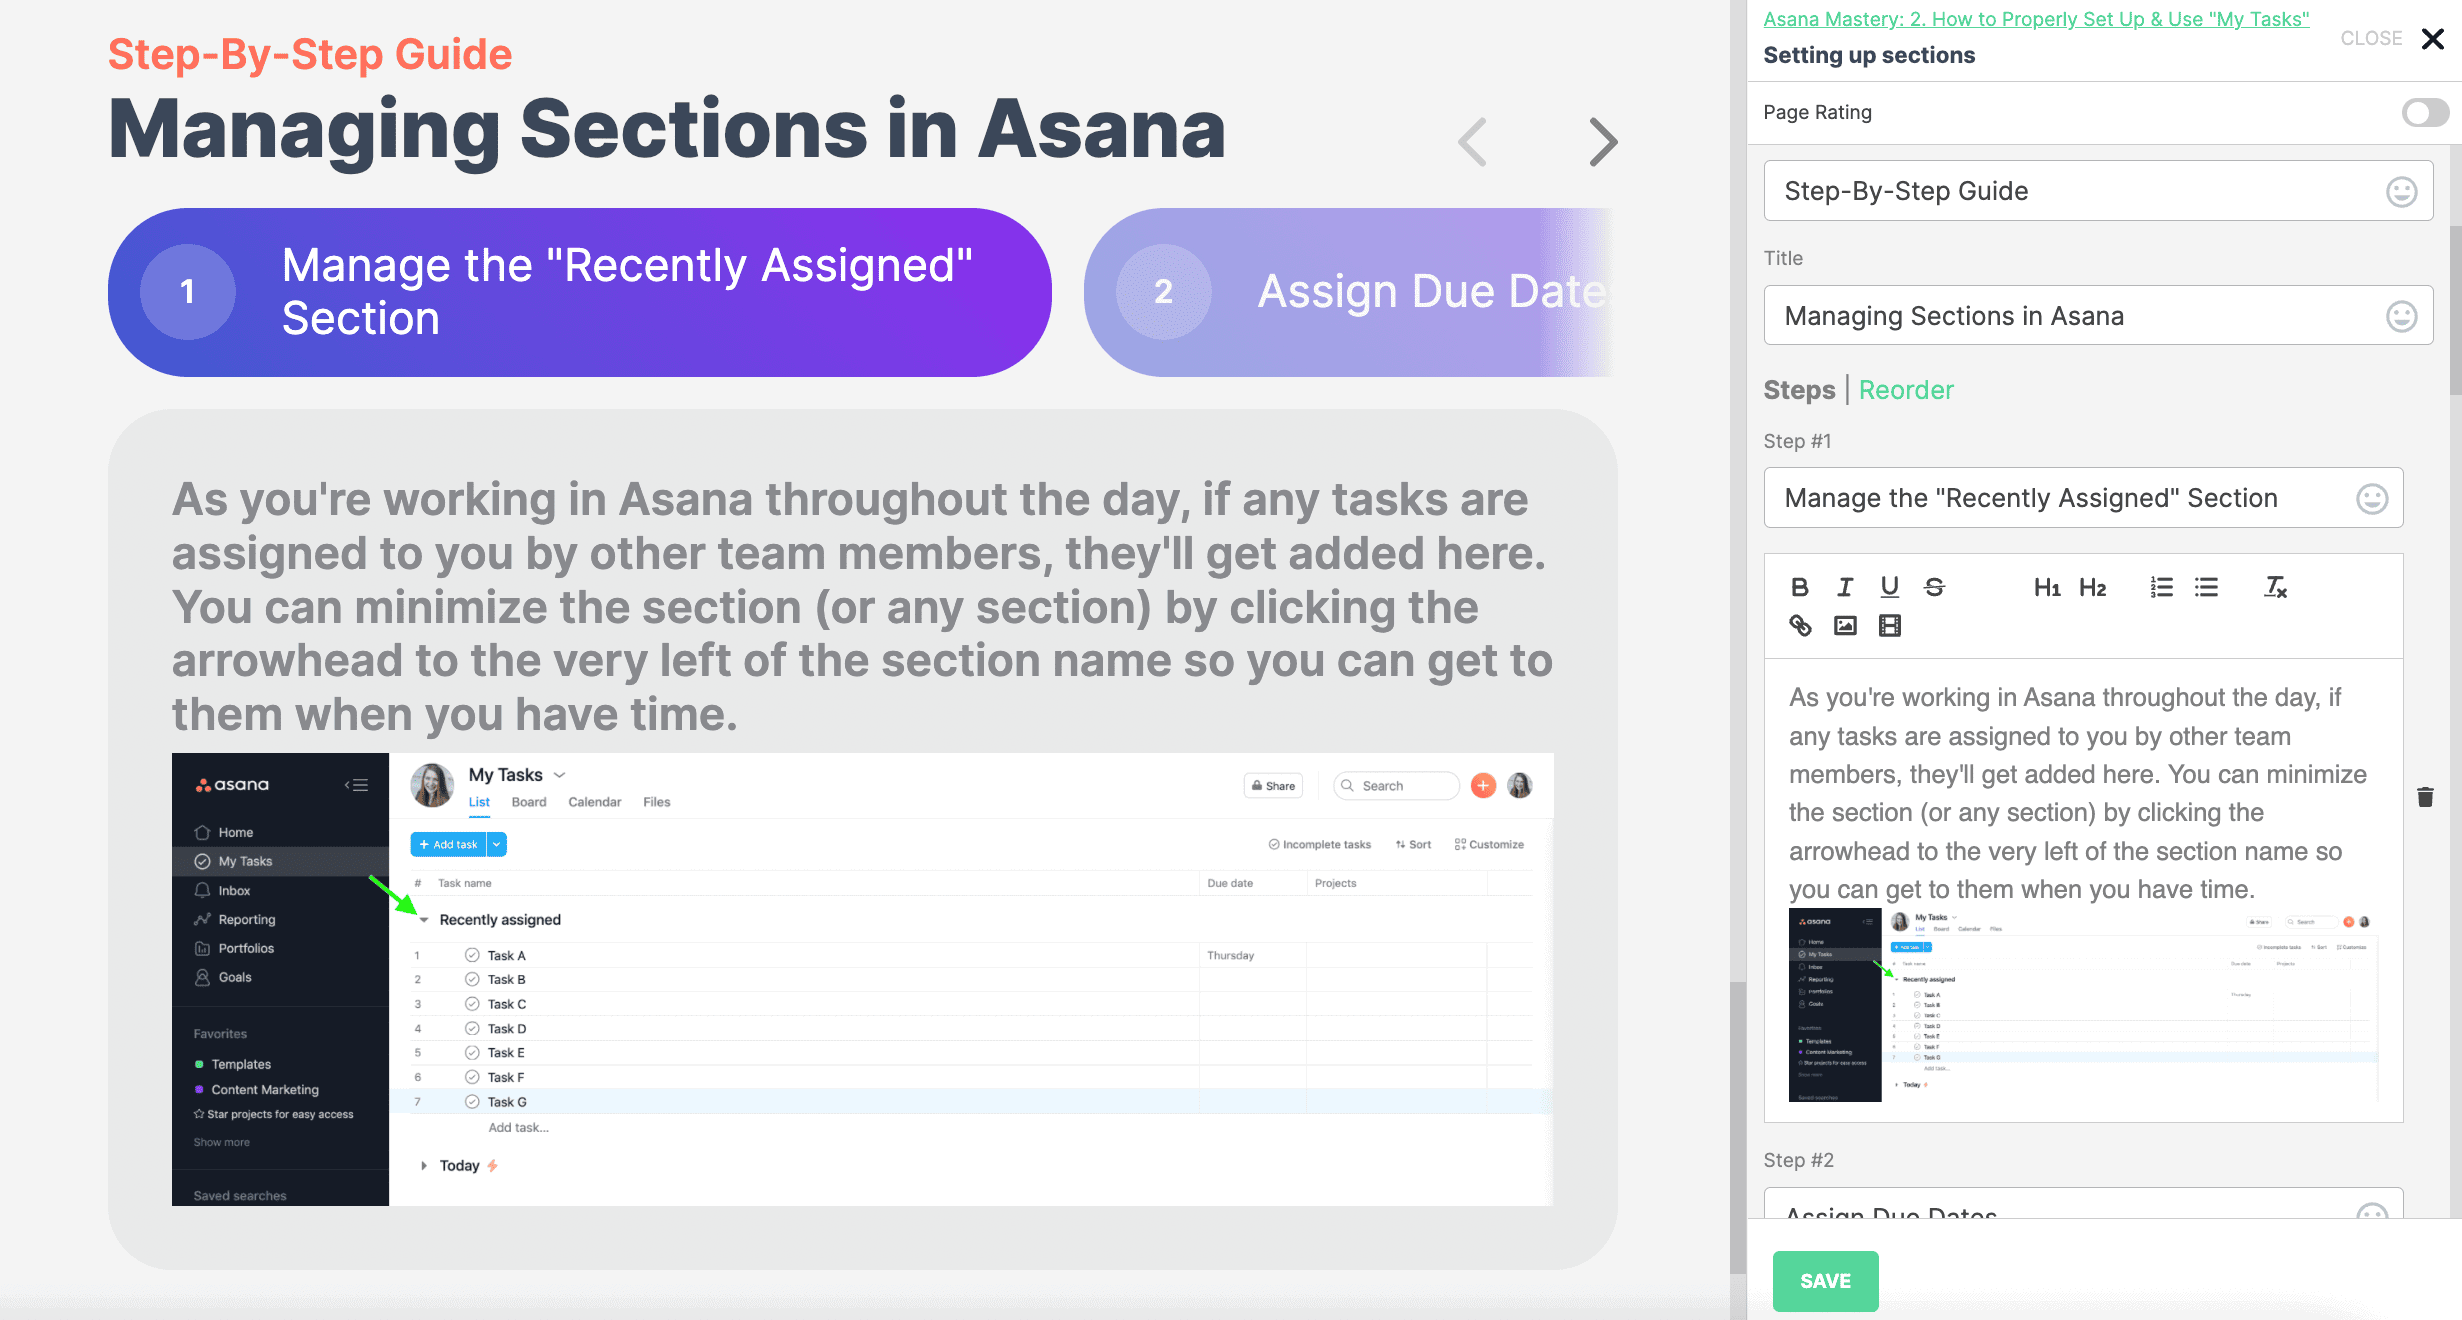
We use Preview almost any time we are making a playbook with Arvo! Screenshots add life to your business processes and make them much easier to understand. You can add photos directly into your step-by-step component. 🙂
Snipping Tool (if on a PC)
The Snipping Tool helps you take screenshots on a PC. With the Snipping Tool, you can easily take screenshots of your screen and edit them as needed. The Snipping Tool is great for adding images to your documentation.
Grammarly
Grammarly is a great tool for those who want to create high-quality documentation! Grammarly helps check your grammar and spelling, making it easy to proofread your documentation to ensure that it's error-free. Note: Grammarly has to be enabled via your browser!
Grammarly works in Arvo!
Google Docs, Sheets, Slides:
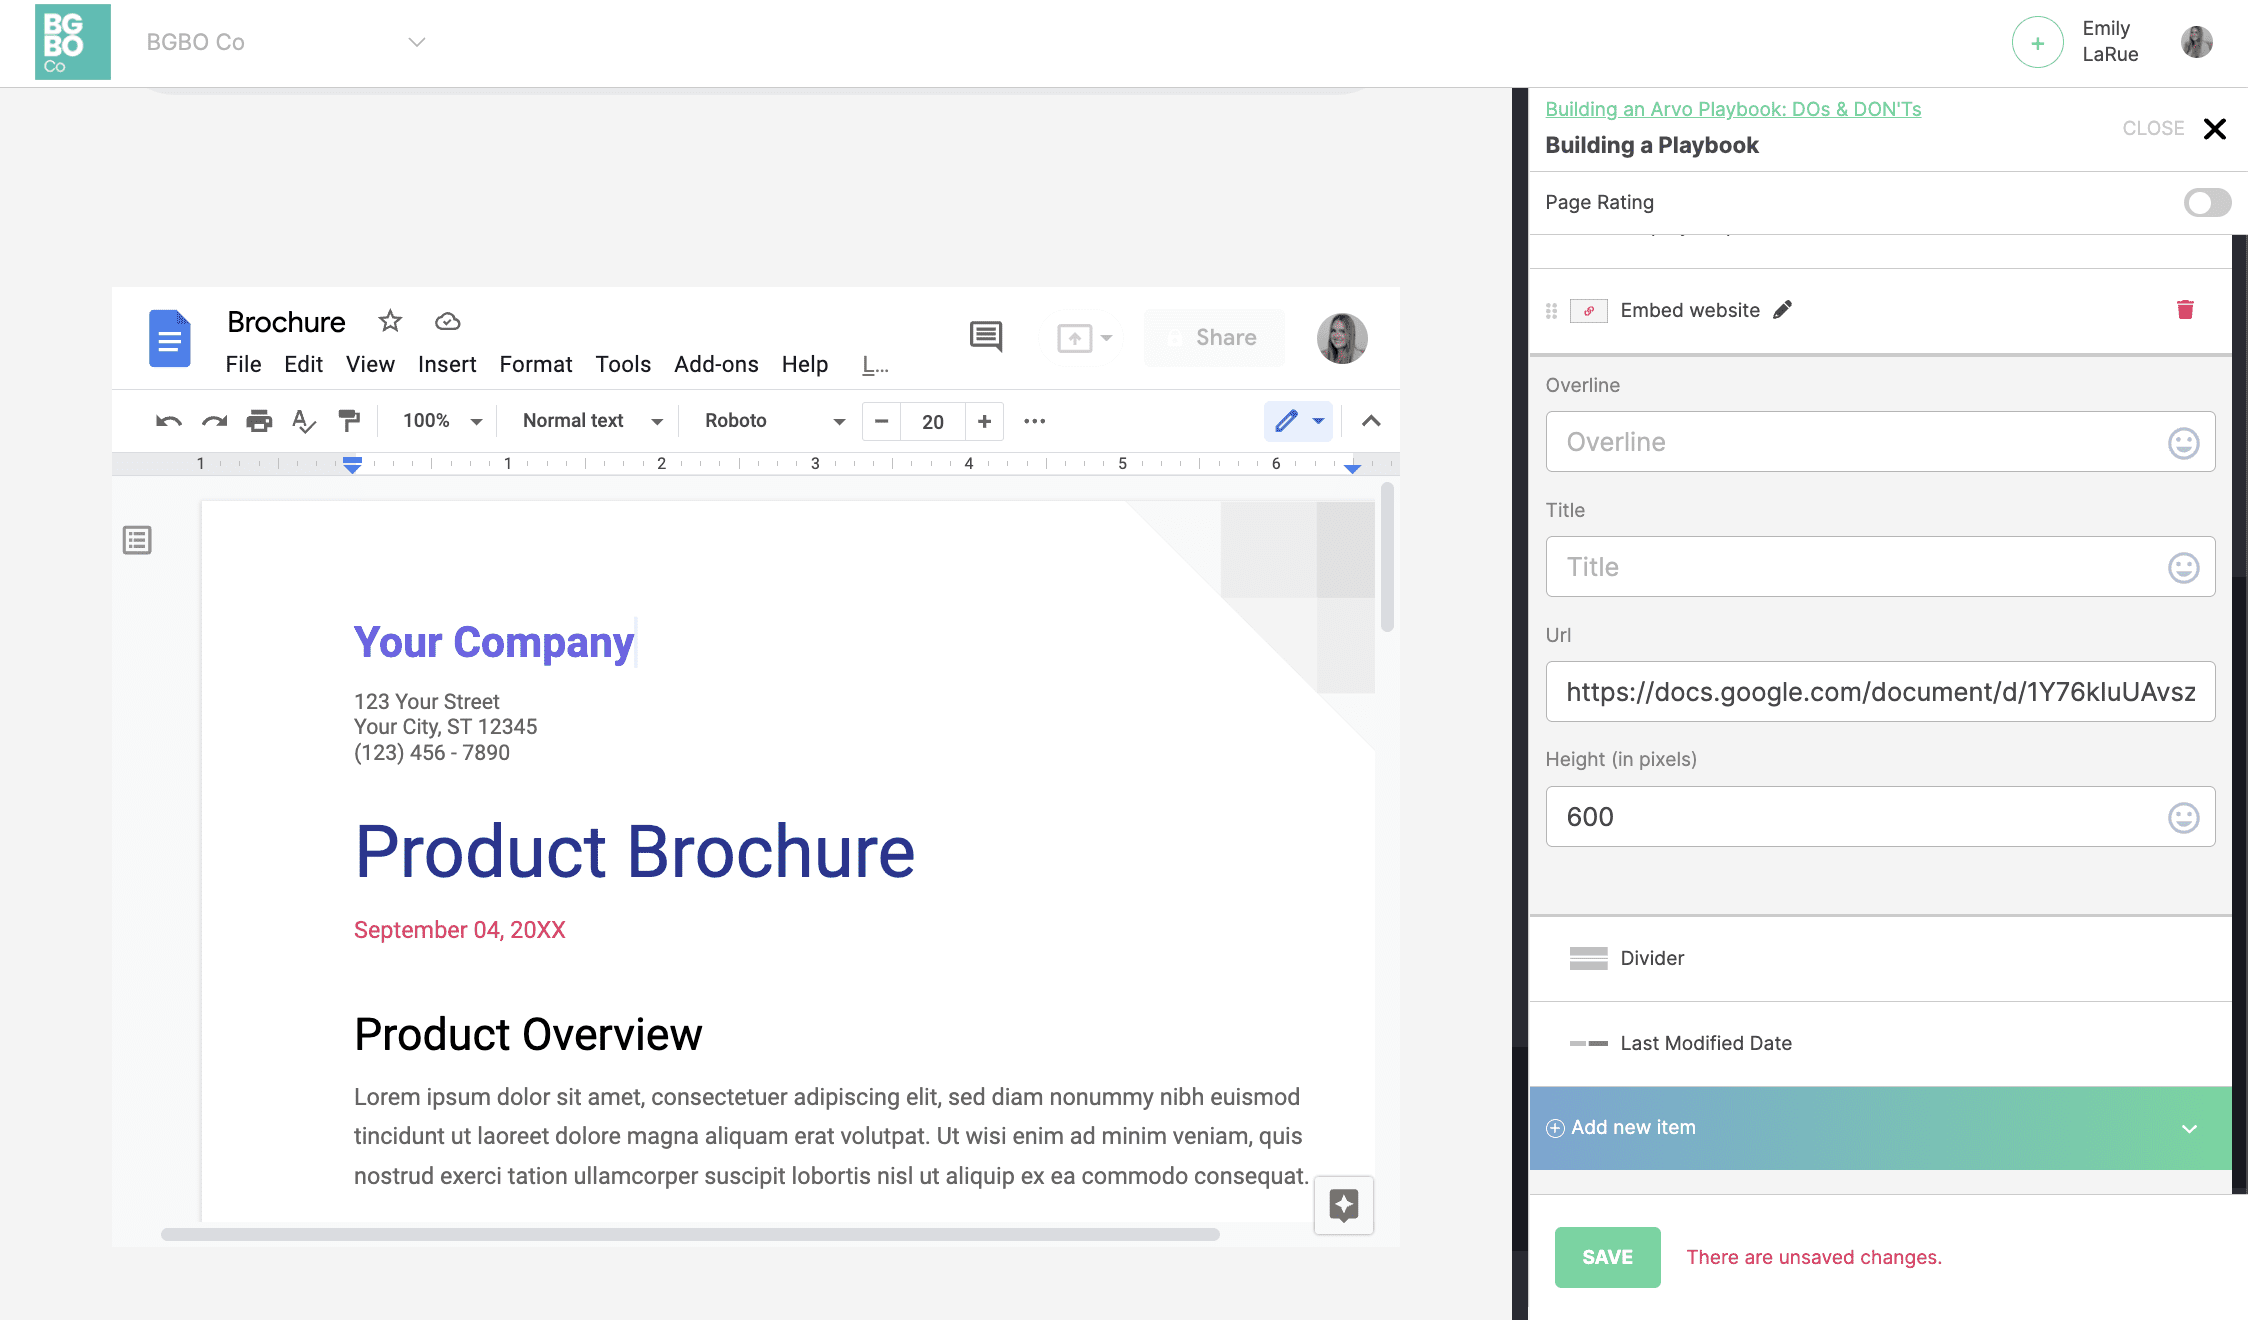
The Google Suite pioneered the building of initial documentation, and we love them for that. But paired with Arvo’s "Embed Website" component, you can now take your collaborative documents to new heights! Simply grab the file’s publicly available share link, paste it in the embed field, and then your live document or spreadsheet will be available to all within your playbook page. If the user viewing the playbook has editing access to the embedded file, they can make edits directly in the playbook.
Pro Tool or iMovie
iMovie is a tool that helps you create and edit videos for your documentation. With iMovie, you can easily add titles, transitions, and effects to your video. For more advanced editing try Pro Tool! It's more technical but pretty intuitive for someone new to editing.
iMovie and Pro Tool are both great tools for those who want to create high-quality videos that can be embedded directly into Arvo for a perfectly clear business process. 🙂
Arvo
All of these tools can be used and integrated seamlessly into Arvo! Arvo is a no-code solution used to create beautifully designed playbooks, no design skills are necessary -- all you have to do is type! You can easily create and document beautifully-designed, skimmable business processes and keep them all in a searchable hub for your team. Create it once in Arvo and you'll never have to say it twice.
Documentation is a vital part of any business or organization, but it can be tough to create and format without any design experience. By using a combination of these tools, you can create high-quality documentation with ease!
Do you have a tool that you love to use for creating documentation? Let us know in the comments below!
Questions about how playbooks can help you create your documentaion? Send us a message at getanswers@askarvo.com or use the chat feature on our website!


.png)

.png)
.png)
.png)
.png)
.png)
.png)
.png)
.png)
.png)
.png)
.png)
.png)
.png)
.png)
.png)
.png)
.png)